Recipe:
Batch Size: 5.5 Gallons Wort Size: 5.5 Gallons
Preboil Wort Size: 6.47 Gallons
Grain: .5 Lbs Cara-Pils Dextrine Malt
Extract: 6 lbs Muntons DME - Extra Light
Hops: 1 oz Cascade Pellet Hops
Yeast: Danstar Nottingham Dry Yeast (We upgraded the recipe to 2 packs of yeast)
- We did this one inside. Decided not to use the new burner and avoid the cold.
- Added 4 Gallons of Festival Drinking Water to the 33 quart pot and begain the boil.
- 150 degree steep of the grains for 30 minutes.
- After steep, brought to a boil and added extract. Killed the boil temp with the extract, but brought it up relatively quickly again.
- On a suggestion, left a wooden spoon in the wort during the boil to control the break. The break was not nearly so difficult. We kept our squirt bottles handy and kept stirring, and managed our temperature better (turned down heat as we needed). We had no boil-over.
- We boiled 3 additional gallons of water after the break in a second pot and added the boiling water to the wort at 5 minutes to go. Probably a bad idea, but have to keep trying to make things easier ;)
- Dragged the boil outside to cool with the immersion chiller. Cooled to 75 degrees in around 10 minutes and brought it back in to transfer to the primary fermenter.
- Let it cool to 72 degrees before pitching the yeast.
- Initial Gravity: 1.048
Sunday, November 28, 2010
Thursday, November 18, 2010
Batch #6 - Cream Ale for Cherry Beer - FAILURE#3
Again, we try this batch. We replaced the extract, grains, and drinking water we used in the first attempt of this batch (Batch #5).
- We used less water in our initial boil, and settled on 4 gallons in the pot.
- Steep was normal. 150degrees for 30 minutes. We ground the grain again ourselves with the magic bullet.
- Extract didn't boil over as much this time, but we still managed a small amount. (We haven't had a boil yet where we were able to handle the break)
- Hops additions were per recipe.
- We boiled outside and used the immersion chiller to cool.
It started to go wrong at this point.
- We tried purchasing a different carboy cap for this batch, and didn't realize it was a blowoff cap. It would only fit hoses, the standard airlock wouldn't go. Be actually broke an airlock trying to make it work.
- We decided to leave batch with a cap on it while we got a new cork. Unfortunately, all the stores were closed at this point. We found a cork cap at menards without a hole in it, but for some reason, decided not to bother with messing with it that night. The next day, April went to Plan-It Earth - a local healthfood store (they have a brewers section) and picked up a few rubber stoppers. Unfortunately, neither of them fit, but the bigger problem was, the wort now smelled like strained peas after sitting overnight. The smell was completely repulsive to both of us.
- Again, rather than continuing, we dumped the batch.
Tuesday, November 16, 2010
Batch #5 - J.A.K.E.'s Boot Reer - FAILURE#2
Tonight we tried our hands at root beer making. Jared and I had the boys helping. I think they liked it but did not really enjoy the work. But who enjoys work? We bought a bottle of the flavoring and followed the directions that it came with. It really was very easy. If we like this we will be making some more!
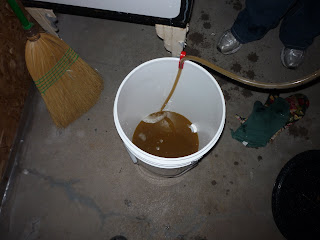
We started with four and a half gallons of water. It said that it should be room temp but we did not have any that was not ice cold. So we boiled some up and used the immersion chiller to cool it down to ninety eight degrees. Jared using the immersion chiller on the bucket of water. I have to warn you that a lot of the pictures were taken by the kids. I wanted to get them as involved as I could.
 A close up of the immersion chiller. We have already sent this one in to get printed. It will be going on our beer wall!
 We used one pack of Champagne yeast.
 We let the yeast soak for a bit in room temp water, as per the directions.
 The Teche boys sterilizing bottles
 We used eight cups of sugar. The above picture is of Kellen stirring the sugar into the water to dissolve it and Ethan adding the sugar
 Now they are reversed. Kellen is pouring and Ethan is stirring
 Adding the flavoring. I only added half of the bottle to start with.
 Kellen stirring the flavor in
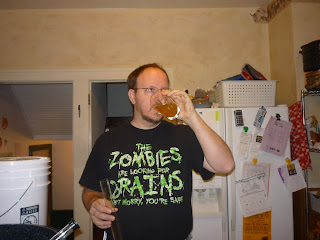
 First taste test
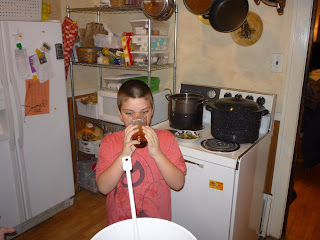 YUMMMMY!
 Thumbs up! We thought that it tasted a little light on the flavoring so we added the rest of the bottle. Then it was too strong so we added another cup of sugar. So we have a grand total of nine cups of sugar and one full bottle of flavor. After the last taste test we stirred in the yeast and water. And then we were onto the bottling
 We bottled some of the Boot Reer in half gallon growlers. The above picture is of Kellen getting a growler filled
 Ethan filling a growler
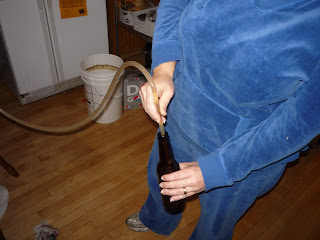
 We also filled some bottles. This is a bottle being filled. Our filler wand broke just before we were going to use it so I had to use the auto siphon to fill. It was a pain and messy. With having two kids helping we had a few over filling problems.
 Ethan working hard to cap his bottle
 A beautiful filled growler
 Kellen capping
 More of Kellen capping. Watching the boys cap was VERY funny. The faces that were made were hilarious!
In total we made four gallons of Boot Reer. We are storing it in the tub just in case a few of them explode. We are expecting to have a few bottle bombs on our hands. I will post again how it tastes and if any explode.
I am thinking that a Boot Reer float party is in order this weekend!
Update:
The root-beer didn't turn out. The flavor is fine, but there is zero carbonation. No pop, no fizz when you open the bottles. We tried the same trick with the beer, moving the bottles in front of a heat register, but this didn't help. We're pouring our our first attempt and trying again soon. We still hoep to have a successful root-beer by Christmas.
We started with four and a half gallons of water. It said that it should be room temp but we did not have any that was not ice cold. So we boiled some up and used the immersion chiller to cool it down to ninety eight degrees.
 Jared using the immersion chiller on the bucket of water. I have to warn you that a lot of the pictures were taken by the kids. I wanted to get them as involved as I could.
 A close up of the immersion chiller. We have already sent this one in to get printed. It will be going on our beer wall!
 We used one pack of Champagne yeast.
 We let the yeast soak for a bit in room temp water, as per the directions.
 The Teche boys sterilizing bottles
 We used eight cups of sugar. The above picture is of Kellen stirring the sugar into the water to dissolve it and Ethan adding the sugar
 Now they are reversed. Kellen is pouring and Ethan is stirring
 Adding the flavoring. I only added half of the bottle to start with.
 Kellen stirring the flavor in
 First taste test
 YUMMMMY!
 Thumbs up! We thought that it tasted a little light on the flavoring so we added the rest of the bottle. Then it was too strong so we added another cup of sugar. So we have a grand total of nine cups of sugar and one full bottle of flavor. After the last taste test we stirred in the yeast and water. And then we were onto the bottling
 We bottled some of the Boot Reer in half gallon growlers. The above picture is of Kellen getting a growler filled
 Ethan filling a growler
 We also filled some bottles. This is a bottle being filled. Our filler wand broke just before we were going to use it so I had to use the auto siphon to fill. It was a pain and messy. With having two kids helping we had a few over filling problems.
 Ethan working hard to cap his bottle
 A beautiful filled growler
 Kellen capping
 More of Kellen capping. Watching the boys cap was VERY funny. The faces that were made were hilarious!
In total we made four gallons of Boot Reer. We are storing it in the tub just in case a few of them explode. We are expecting to have a few bottle bombs on our hands. I will post again how it tastes and if any explode.
I am thinking that a Boot Reer float party is in order this weekend!
Update:
The root-beer didn't turn out. The flavor is fine, but there is zero carbonation. No pop, no fizz when you open the bottles. We tried the same trick with the beer, moving the bottles in front of a heat register, but this didn't help. We're pouring our our first attempt and trying again soon. We still hoep to have a successful root-beer by Christmas.
Monday, November 15, 2010
Cool Beer Picture That I Took
I was trying to get artsy and hit on a good picture! I took this as we were bottling the pumpkin ale. Jared and I have already framed it we loved it so much! We are going to have a wall of neat beer/ brewing pictures. So if you have any good ones that I might like and you don't mind me using please send them to me. My e-mail is techeapril@yahoo.com

Completed Cream Ale
On Saturday night we taste tested the completed Cream Ale that we had bottled two weeks ago. Yes I am a dork. I made a sign so I could tell what was what on the camera and then decided to use the pictures!
 Jared pouring the first beer
 Taste testing it.
Now, both Jared and I thought that the brew was a good one. We did notice that the carbonation was low. We wonder if we kept it in too cool of a spot. We have since moved the storage of beer upstairs. Just to see. But otherwise the flavor was good and the color was also good. Not a bad first beer!
 Yes I am a dork. I made a sign so I could tell what was what on the camera and then decided to use the pictures!
 Jared pouring the first beer
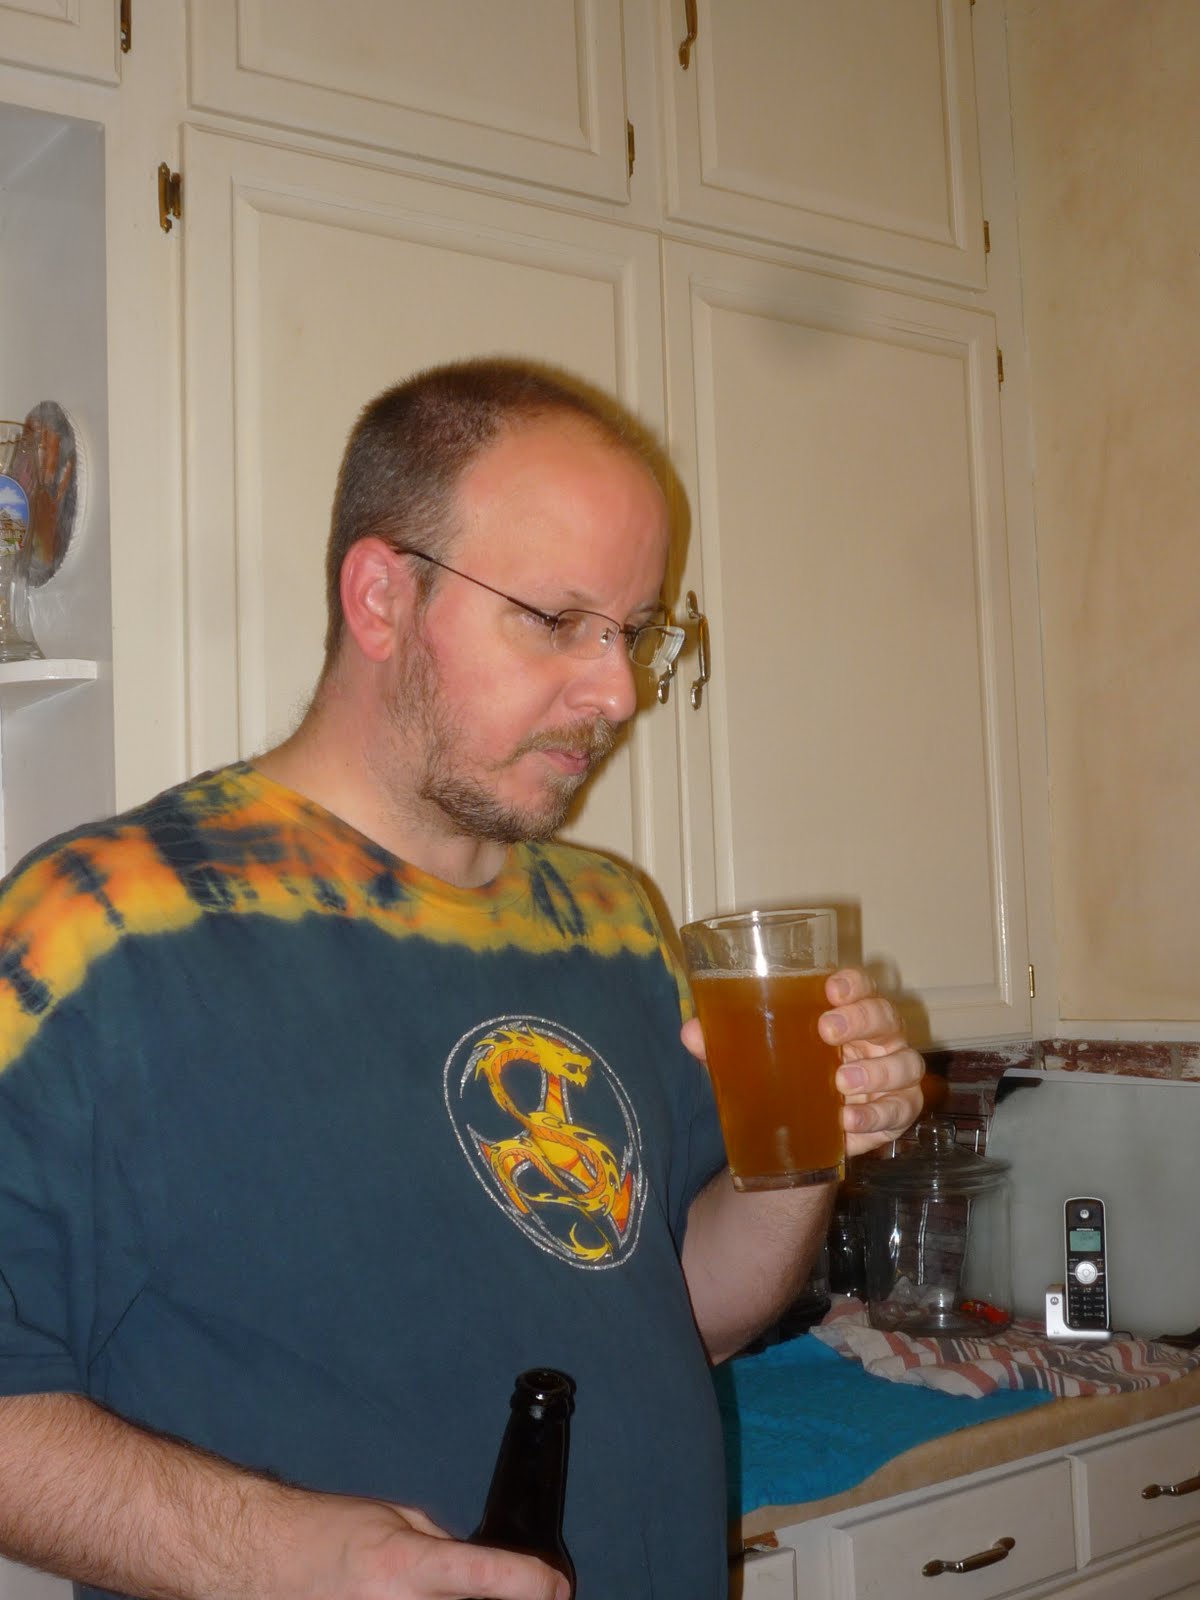 Taste testing it.
Now, both Jared and I thought that the brew was a good one. We did notice that the carbonation was low. We wonder if we kept it in too cool of a spot. We have since moved the storage of beer upstairs. Just to see. But otherwise the flavor was good and the color was also good. Not a bad first beer!
Sunday, November 14, 2010
Batch #4 - Cream Ale for Cherry Beer. - FAILURE#1
We used the same recipe for Cream ale for this batch we used for Batch #1.
As with the Red Ale, we brewed in a 33 quart enameled stock pot.
We used the same new toys from that batch (brewed the same day).
Unfortunately, we didn't get far on this batch. We added the full 6.5 gallons of water to the pot. We steeped the grain as normal, grinding the grains with the magic-bullet. After steep, we brought to a boil and added the malt extract.
Right after the extract, we brought to a boil again and ran into major issues. Unfortunately, I couldn't stop laughing as our expensive extract boiled right out of the pot, but I would guess we lost nearly 1/4 of the extract onto the garage floor. We hemmed and hawed for a few minutes, but decided that this batch should now be abandoned. I poured the remaining wort into the drive-way and we cleaned up.
Batch #3 - Red/Amber Ale.
Red Ale/Amber Ale Recipe.
Batch Size: 5.5 Gallons. Wort Size: 5.5 Gallons.
Preboil Wort Size: 6.47 Gallons.
Grain: .5 Lbs Crystal 80L, 0.13 Lbs Roasted Barley, 0.13 Lbs Special B Malt
Malt: 6 Lbs Muntons DME - Light
Hops: 2 oz Cascade Hops
Yeast: Danstar Nottingham Dry Yeast
Modifications:
We used two packs of Nottingham Dry Yeast. This was recomended by the owner of Point Brew Supply and O'so brewery. He believes adding another pack of yeast at pitch is more effective than using an oxygen stone and pure oxygen injection into the wort pre-pitch.
New additions:
We purchased a propane burner and an immersion Chiller for new batches.
Brewing Notes:
- Brewed this batch in the garage.
- Added all 6.5 Gallons of water to the brew pot to start.
- The grinder at Point Brew Supply died for the guy in front of April when she was in line to grind, so we grount our grains at home using the Magic Bullet and pulsing to crack the grain.
- Bring the heat up on the batch was MUCH faster this time. It took a short 15 minutes (or so) to bring up the heat to the initial 150degrees for steeping the grain.
- Grain steep was 30 minutes as the recipe called for.
- After steep, once again, the time to bring up to boil was remarkably quick! I love the new burner!
- We had minor boil-over when we added the malt-extract to the batch. We controlled with stirring, reducing heat, and spray bottles full of cold drinking water.
- Once we were up to boil again and after the break, we added the hops, 1oz Cascade, and started the 60 minute boil timer.
- We added the last 1oz Cascade hops at 20 minutes remaining on the boil.
- Once the boil was complete, we used the immersion chiller to cool the wort. This was WONDERFUL! We cooled down to 70 degrees in approxmately 20 minutes.
- Once cool, we transferred into a 6.5 gallon glass carboy. We let it sit inside, covered while we cleaned up and came in to pitch the yeast. We poured both packs of nottingham yeast right in without solution and stirred in.
- Wort gravity before pitching the yeast: 1.042
Additional notes:
Brewing outside in the cold kind of sucks. It's a huge time-saver, but our garage needs a little help to make doing this easier even in warmer weather. With the weather cold enough, we noticed that the steam from the boil condenses much faster and comes down as a fine mist, getting into the wort again.
Bottling notes:
We are bottling on 11/28, two weeks after the start of fermenting.
- Pre bottling gravity: 1.010
With a starting gravity of 1.042 and a finish of 1.010, we should have an alcohol content of 4.9% abv.
- It took quite a while this time (nearly an hour) for the temperature of the sugar solution to drop to 70 degrees.
Monday, November 1, 2010
Batch #2 - Pumpkin Beer On Halloweenie!
 The new carboy and carrier
 At the break
 The pumpkin that we put into the wort
 The yeast that we used since the other was recalled
 Adding the pumpkin. This was 30 minutes after the break
 Adding the second and third set of hops.
 Cooling the wort
 Putting the wort into the carboy for fermenting
 Wort heading to the carboy to be fermented for a few weeks
Original Recipe:
American Wheat
Batch Size: 5.5 Gallons Wort Size: 5.5 Gallons
Preboil Wort Size: 6.47 Gallons
Grain - 0.5 lbs Cara-Pils Dextrine Malt
Extract - 6.0 lbs Briess DME- Weizen
Hops - 1.0 oz Hallertauer Pellets (Tradition pellets substituted instead, we didn't ask why)
Hops - 1.0 oz Liberty Pellets
Yeast - Danstar Nottingham Dry Yeast (Danstar Windsor Dry Yeast substituted again - Nottigham recalled)
***Added ingredients - 3x30oz cans of Libby's Easy Pumpkin Pie Mix.
We went into this with the intention of already modifying the recipe. We wanted to try a pumpkin beer. As we did our research into this, we were recommended by the folks at Point Brew Supply to use a wheat beer base so as to not drown out the pumpkin flavor. We were told to add the pumpkin into the Mash Tun, but didn't really understand what that meant so continued to research. Suggestions ranged a bit on how to add it. 1. Raw pumpkin cubed in a muslin bag, done as a "mini-mash" prior to boil. 2. Baking cubed pumpkin first and adding to muslin bag the same way. 3. Using pumpkin pie mix and baking it for 60-120 minutes and adding baked result to the boil. 4. Add pumpkin puree right to the boil. We opted for option 4. We added 3 30oz cans of Pumpkin Pie Mix to the boil at 30 minutes. We wanted time for the starches to cook off, but didn't want all the flavor to go so we guessed and went for the middle of the boil.
Initial Brewing notes:
- We purchased a 33 Quart Stock pot (8.25 Gallons) for the occasion. It is an enameled canning pot with no handles. The assumption was, if this pot doesn't work out, 1. It was on Sale. 2. It can be used for canning next summer.
- We brewed anyway, but noticed again that there was a fair sized chip in the enamel exposing the metal underneath. It was new, so there was no rust, but a potential issue anyway. Intend to buy a stainless pot and a burner for next time as this is already getting ridiculous.
- Pre-cleaned and sanitized everything and had a 5 gallon solution of Star-San standing by as needed. Anything we didn't need in our hands sat in the sanitizer most of the time.
- Water used this time was SuperChill drinking water purchased at Festival Foods in gallon jugs.
- Grain was crushed/ground for us at Point Brew Supply 1 day prior to brewing.
- Steeped grain in a muslin bag at a temperature range of 151 to 157 degrees for 30 minutes. Squeezed liquid out of bag at end of cycle.
- Had spray bottles (filled with same drinking water) standing by for the heat break during the boil after adding the extract. We still had some boil over while we worked to figure out how to control the foam with the bottles, but it worked much better than last time.
- Added the extract once the water was boiling, once the heat break finished, added the first hops, 1 oz Tradition pellets.
- At 30 minutes into boil, added our pumpkin. This took the temperature of the boil way down. Didn't bother to get a temperature at the time which may have been a mistake, but we stopped the timer until the wort was boiling again. This added 18 minutes to the total cook time.
- At 20 minutes remaining, added (per original recipe) .5 oz Liberty pellet hops. (We eyeballed half of the pouch)
- At 10 minutes remaining, added (again per original recipe) remaining .5 oz Liberty pellet hops.
- At completion of boil, we rapidly cooled the entire pot to 70 degrees using an ice bath.
- At 69 degrees, we removed from the ice bath and began siphoning the wort into a 6.5 Gallon glass carboy. We got a carboy carrier, but not an opaque bag as they didn't seem to have one in stock. (nor do I remember asking about it so my bad)
- We pumped the wort into the carboy fairly vigorously to increase the amount of air added. Not great to use outside air for this, but we don't have an oxygen stone yet.
- Initial gravity recorded at 1.062. The Max Gravity for the batch was supposed to be 1.055 but the pumpkin messed up those numbers.
- Pitched the yeast at around 68 degrees. Some of the yeast ended up stuck to the neck of the carboy. Oops, what a waste.
- We will need to monitor the gravity closely on this batch toward the end of the fermenting cycle as we don't know what the final should be.
- The carboy is sitting in the basement in my office where I can manage the temperature better, already bubbling nicely after a day. It's covered by a blanket to keep the temperature stable and to keep the light out.
Bottling notes:
- We boiled the corn-sugar solution in a shallow pan, so maybe had a bit too much boil-off. Not sure. When we mixed, the corn-sugar solution was almost a syrup.
- This time, we stirred the sugar solution into the bottling bucket with the beer to more evenly distribute the sugar. Of course, this is what the recipe calls for, but somehow, we missed that last time.
- This beer didn't get put in the basement right after bottling, we set it in front of a heating vent to keep it warm enough to carbonate. Our house Generally stays just under 70 degrees this time of year, so it's a bit too cold especially in the basement.
- Carbonation was perfect if maybe a bit high?
Overall, we think that this beer turned out very nicely. You can smell the pumpkin spices in it right away, but the flavor isn't overwhelming. The 6% abv gives it quite a kick so it's not one to drink a lot of. It got good reviews from the one person so far who's tried it, April's Cousin Bill, who also happens to have done home-brewing himself.
Bottling The Cream Ale
On Saturday October 30th we bottled our Cream Ale. Jared and I both thought that it was bland but would most likely get better with carbonation. The carbonation process will take place in the bottles. We will see in a few weeks how it really tastes. Jared opening the ale pail
 Inside the ale pail. All the scum.....but boy did it smell good!
 Hydrometer reading
 The look of the Cream Ale
 And the first taste.
 Putting the ale into the sugar so the yeast can eat and form carbonation
 The bottom of the ale pail
 Filling a sterile bottle.
 Capping with a sterile cap
 That was easy! The look on my face says it all!
 Jared filling a bottle
 Half of the beer we bottled. We were able to get 45 full bottles!
 Jared opening the ale pail
 Inside the ale pail. All the scum.....but boy did it smell good!
 Hydrometer reading
 The look of the Cream Ale
 And the first taste.
 Putting the ale into the sugar so the yeast can eat and form carbonation
 The bottom of the ale pail
 Filling a sterile bottle.
 Capping with a sterile cap
 That was easy! The look on my face says it all!
 Jared filling a bottle
 Half of the beer we bottled. We were able to get 45 full bottles!
Sunday, October 10, 2010
Batch #1 - Cream Ale
We have now made a batch of Wort. It went well but we did have a few mishaps. It was a kit that we purchased from Point Brew Supply. While we were there the owners helped answer our questions and recommended a good starter beer for us. It will be great to pick their brains as we get more involved in brewing. If you are thinking of starting check out their website or stop on in if you are close enough. We choose to make a Cream Ale as our first beer. It is supposed to be a light beer without a lot of hoppy-ness. Jared and I have decided that we have to work on liking the hoppy-ness of beer. We also chose to do extract brewing for the first time.
Cream Ale Stats
Min OG 1.044 Max 1.055
Batch size 5 1/2 gallons (Ours made 5 gallons, Not sure if we had a lot of boil off)
6 pounds Muntons DME- Extra Light
.50 Pounds Cara-Pils Dextrine Malt (The store ground this as we were using it with in a few days of grinding)
1 oz Cascade Hops
Yeast Danstar Nottingham (dry yeast)
 Jared getting ready to boil the water. We used bottled water as we were not sure of our tap water
 Our Ale Pail. We will upgrade this to a glass carboy if we have a few successes
 We used a powered sanitizer that does not hurt the brew if some is left in. It is safe to drink. Above is the bucket that we used to sanitize our tools in
 We put our grains in a sock and steeped them in the water at 155 degrees and did not let it boil. The picture above is after the sock was taken out. No, I did not use a real sock we used what came with the kit.
 This is after we added the malt. This is also before the break. We had a bit of trouble controlling the break. We had a bit of a boil over. We did get it under control.
 This is during the break.
 The mess on the stove
 After the break and after the hops were in. This was taken just before we went to cool it. Also, we wanted to see how much boil off we had. But, since we had a boil over it is not very accurate
 Cooling wort. We did get it down to 69.5 degrees. This is another thing we will be updating when we have done a few batches
 Moving the wort into the first fermenter
 A better view
 The water and ice bath that we used to cool the beer. We also used it to cool the boiling water that we used to get the wort up to the correct hydrometer reading.
 The wort fermenting
 The mess on the stove. It is a sticky mess. I guess it is a small price to pay for our own home brew.
Now I would like to make a few notes on the batch so that we may refer back to it when we can drink it and see if it is any good.
-Sanitized everything from beginning to end
-Great Value Drinking water
-Pot had some rust on bottom - we're a little worried about this. The enamel looks to have chipped in a few places... This pot is normally used for canning where that doesn't matter much.
-Temp during steep ranged from 153 to 163 degrees
-Boiled over at malt stage (spray bottle needed to control better? perhaps a taller pot?)
-Gravity just before we pitched the yeast: 1.050
-stirred yeast in after pouring.
-No other yeast prep per recommendation of owner of Point Brew Supply.
-Temp at yeast pitch 68 degrees
-topped off to 5 gallons with boiled cooled water
-the recipe calls for Danstar Nottingham dry yeast, but this was recalled. Danstar Windsor dry yeast was substituted.
Later notes:
- The ideal temperature for this batch is supposed to be 64-74 degrees F.
- The first few days of the fermenting cycle, we ran right at the top end of 74 degrees.
- We used some ice to cool things down a bit, and over the next few days, the temperature dropped down to 63-64. It hovered there solidly until Monday (8 days into the cycle) when I moved it to a slightly warmer room. The temp now sticks at 65.
Bottling Notes:
- The lid was a challenge to remove from the fermenting bucket. I damaged the outside of the lid with pliers while removing, but no scratches on the inner surface so all good.
- There seemed to be no issues with creating the sugar solution to mix the beer in for bottling carbonation. Per directions, 1 cup water heated, sugar added, brought to a boil for 5 minutes, cooled to 70 degrees while covered (not rapid cooled). Poured sugar solution into bottom of second bucket (cleaned and sterilized) and drained beer into it. We didn't mix beyond the mixing action of pouring the beer into the secondary vessel via the spigot on the primary.
- Sterilizing the bottles was interesting and made me worry. I know the idea is as little contact with anything between sanitation and contact with beer, but I had to sanitize 48 bottles which takes some time. Hopefully, we didn't get any contamination. We'll be looking for a more efficient way to do this in the future if possible. As it was, we rinsed each bottle in sanitizer solution and set them on the counter to wait for filling. Total cleaning time was around 30 minutes so the longest exposure for one bottle was 30 minutes.
- The final gravity of the beer was 1.016 at around 68 degrees. This gives us a 4.45% Alcohol By Volume (abv) if I used the calculator correctly.
- The beer tasted like beer, but in general was a little mild for both our tastes. We assume that carbonation and a little more time will add something to it, but for a first effort, we are so far pleased.
After bottling notes:
- At first, carbonation didn't take at all. We waited two weeks, tried it and had very little carbonation. There was some, but not nearly enough. Another week, same results. Another week, same again. We asked around and figured out that we were already storing the beer too cold. We moved the Cream Ale and the Pumpkin Beer both in front of the heat register. Three days later, we had carbonation! Thankfully, we didn't kill the yeast, just suspended it.
- The carbonation in the Cream Ale is inconsistent. We didn't stir the corn-sugar solution in so it wasn't distributed evenly between bottles. Some bottles have little carbonation, some have too much.
- Overall, I like the way this beer turned out. It's a mild beer, but has more flavor than your average light lager. Again, for a first effort, in my mind, it's phenomenal.
Subscribe to:
Posts (Atom)